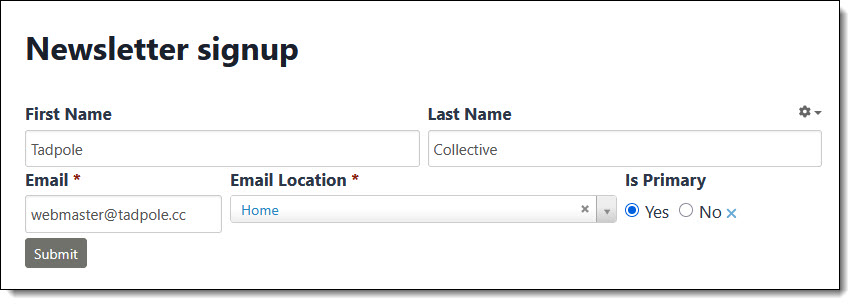
Creating a subscription sign-up form with CiviCRM’s FormBuilder
#2 in a series of practical use cases for CiviCRM
In this series we’ve been exploring practical ways to leverage CiviCRM’s features. One terrific feature of CiviCRM is CiviMail, a sophisticated tool for handling mass email. CiviMail reliably delivers high-volume communications and provides detailed reports on the results and effectiveness of those communications, just like commercial email marketing products, e.g., MailChimp and Constant Contact.
Many non-profit users of CiviMail use it in conjunction with other components, for example with CiviDonate for fundraising or with CiviEvent to send reminders to people who register for an event. But CiviMail can be used for subscription-based, branded communications like email blasts and newsletters, too, so you can broaden your organization’s reach without the added expense of commercial subscription software or the headache of keeping an externally managed mailing list in sync with your CRM.
This post explains how we built a simple subscription form to collect basic contact information and add the submitter’s name to our mailing group. We’ll cover CiviMail and its features in a future post.
Third-Party Form Plugins for WordPress vs CiviCRM’s FormBuilder
With the introduction of CiviCRM’s FormBuilder you can now create a subscription sign-up form that’s built right into your CRM, allowing you to collect and organize subscriber data without having to write code or integrate any third-party form builder plugins. Plugins like Caldera Forms, Contact Form 7, and WPForms are all still valid options for creating forms that integrate with CiviCRM, but if all you need is a few simple inputs to add people to your mailing list, CiviCRM’s built-in FormBuilder works very well.
Subscription management is a great use-case for FormBuilder because the entire process is handled by the form. When a visitor fills out your form, their contact details are written to your CiviCRM database and they are added to a CiviCRM Mailing Group.
How to build your sign-up form using FormBuilder
Create a Group for your Subscribers
Before you begin setting up your form, make sure you have your mailing list group set up. For this example we created a Newsletter Subscribers Group and made it a Mailing List Group Type.
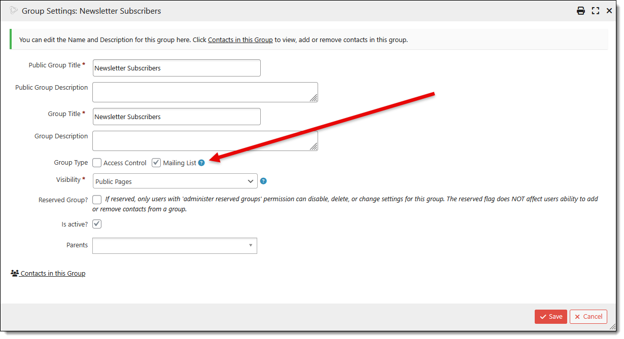
Note that our Newsletter Subscribers Group is not a Smart Group since we don’t need to add or remove subscribers automatically based on any criteria for any reason. Subscribers get added to a regular Group and remain in the Group until they are either manually removed or they remove themselves via the Unsubscribe link in your bulk emails. CiviCRM adds this link to the footer of all your mailings to keep them compliant with anti-spam laws.
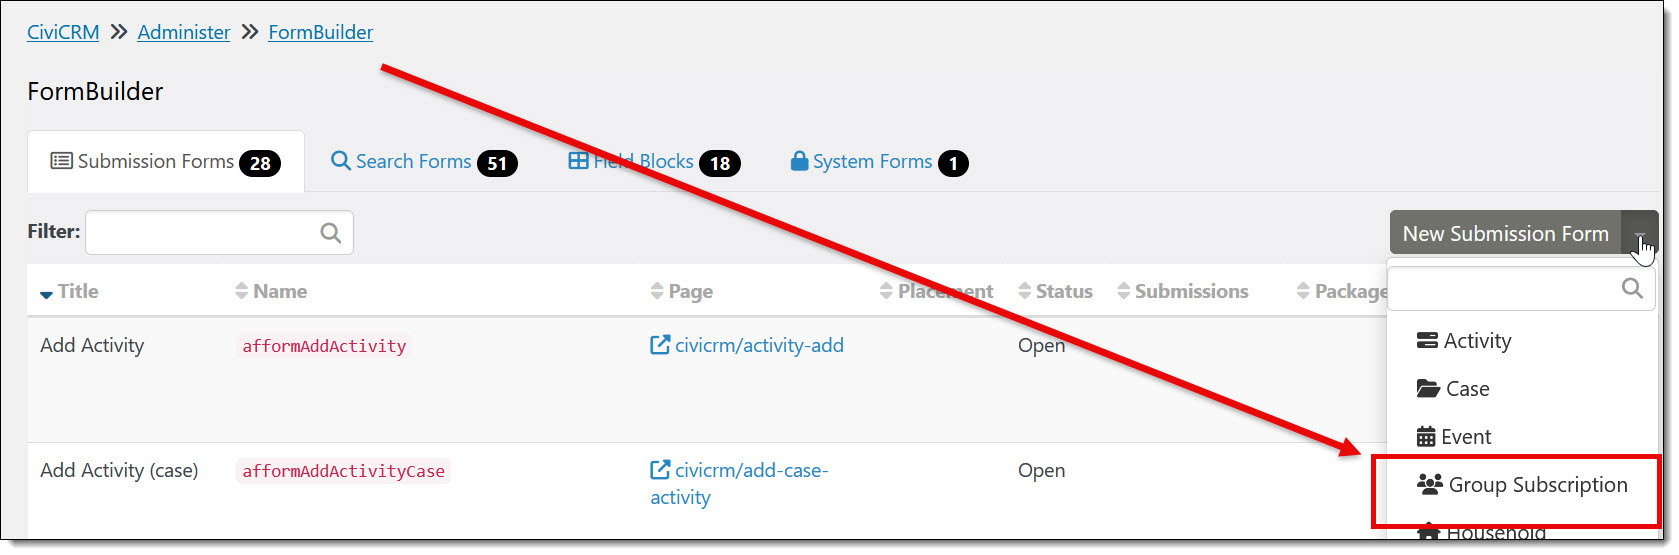
With your Group ready, you can begin setting up your form. Navigate to FormBuilder by selecting Administer-> Custom Data and Screens-> FormBuilder from the CiviCRM menu and then click on New Submission Form in the upper right-hand corner.
You may select the type of Submission Form you want from the drop-down menu or simply click the New Submission Form button. If you do the latter, the FormBuilder will include a tab for Individual 1 and you will need to add the Group Subscription tab manually. If you select a specific type of form, in this case a Group Subscription form, then FormBuilder will set up a tab for Group Subscription and you will have to add the Individual 1 tab manually. Either way will work.
FormBuilder Tab: Individual 1
In a previous post, we outlined how to set up a Form Builder Submission form and looked at the Individual 1 tab.
FormBuilder uses the Individual 1 tab to add or update a Contact in the CiviCRM database. Individual 1 represents the Contact and includes a First and Last Name field – you’ll need to add the Email field by locating it on the left-hand side of the screen and dragging it onto the canvas on the right side of the screen.
Our example collects only a First Name, Last Name and Email but other Contact fields can also be included by dragging and dropping them onto the canvas.
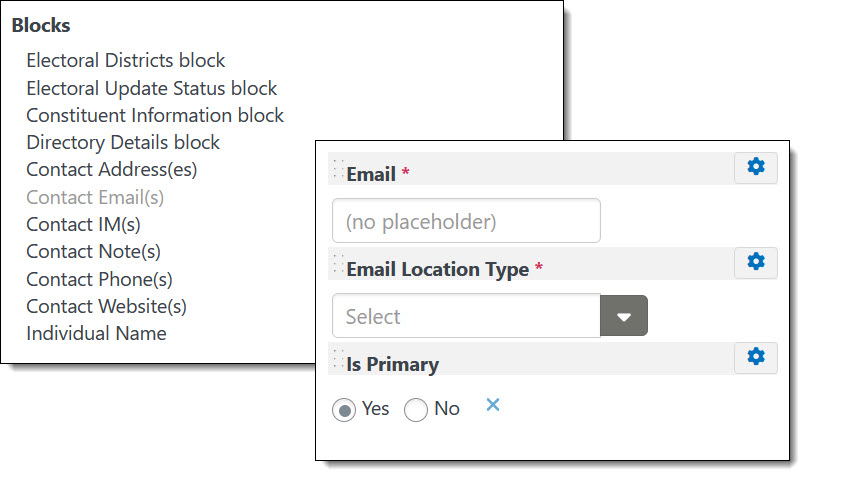
Note that by default, none of the fields you add to your FormBuilder form are Required. To make any field Required, click on the gear icon for the field and check the Required box.
Configuration options for the Email block
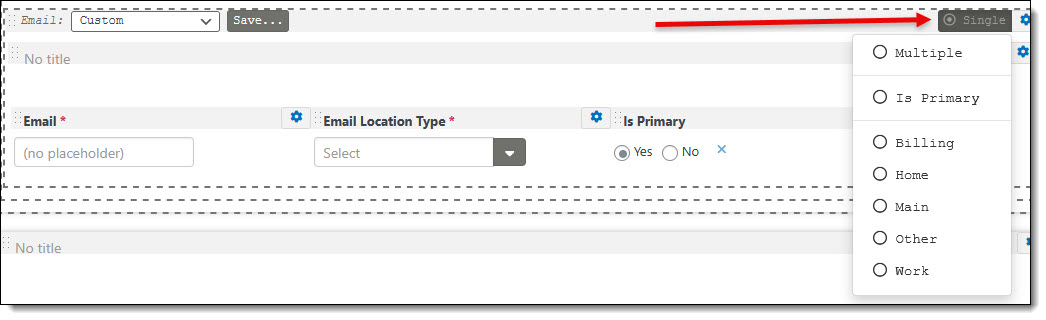
CiviCRM’s email block includes three separate fields: one for the address, one for the Email Location Type (Home, Work, etc.) and one to indicate whether the address is the Primary email for the Contact. Once the Email block is placed on the canvas, you can configure these fields in different ways depending on which information you want to display and collect from the user. Clicking on the Single button that appears next to the gear icon presents a combined view of all the options from the three fields.
We keep the Single setting here because we only want the user to enter a single email address. For other use cases, you may want to provide the ability to add more than one. Clicking on the button will toggle it to Multiple where additional options can be set.
If you want to indicate that the user’s submitted email is their primary email address, you can either allow them to confirm by leaving the field on the canvas or set it here in the combined settings view. If you select Is Primary in the settings view then the field will disappear from the canvas.
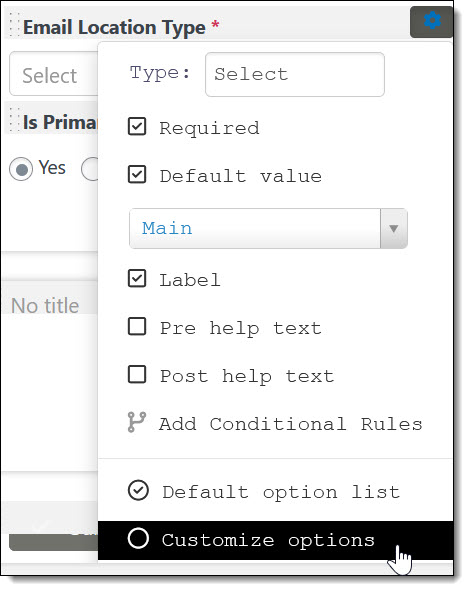
The Email Location Type field works the same way: you can either ask the user to select from the options or pre-set it for them from the combined settings drop-down and the field will be removed from the canvas.
If allowing the user to self-select the Email Location Type, you can also limit the options, for example, to Home, Work and Other. To limit the options, click on the gear icon for the field, then select “Customize options” from the menu. From there you can remove and reorder the choices available to the user.
Another way to set these options without asking for user input is to set the value in the field and then change the field type to Hidden.
FormBuilder Tab: Group Subscription
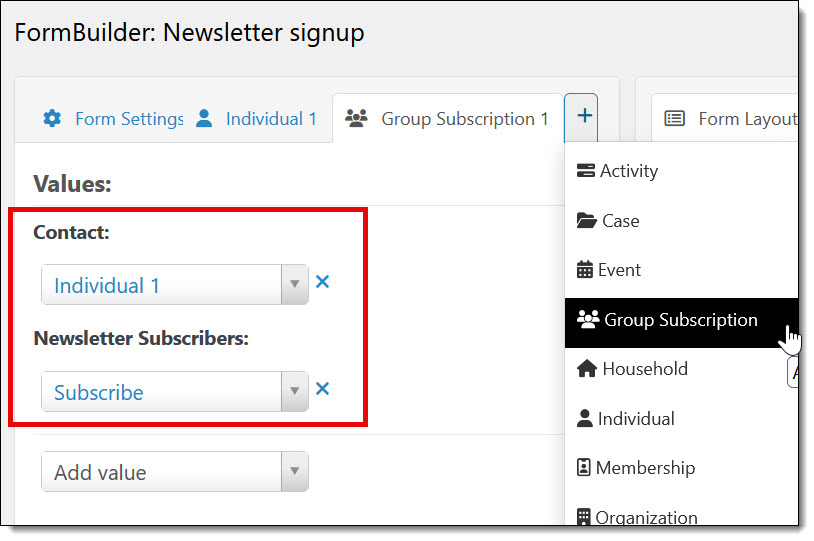
Once you have all your Contact fields in place, the only other tab you need to add to your Form Builder form is the Group Subscription tab to indicate which Group you want your Contact to be added to.
Click the + sign to add a new tab and select Group Subscription from the drop-down options. FormBuilder will add a new, empty container to your canvas. Nothing needs to be added to the canvas area – just set the two values in the tab settings. Select Individual 1 for the Contact field and whatever Group you want to subscribe them to in the other, empty field. Once you select a Mailing Group, the value options become Subscribe or Unsubscribe. For our Newsletter Subscribers form we are only offering the option to subscribe so we set the option here and we uncheck the Unsubscribe option from the Allowed Actions at the bottom of the screen.
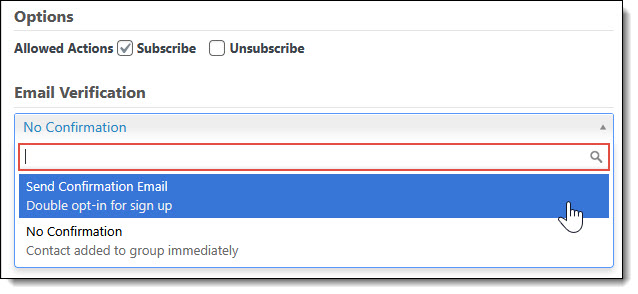
We also want a “double opt-in” for our list (to reduce the number of spam Contacts in our CiviCRM database) so we select Send Confirmation Email under the Email Verification settings.
Adjusting the FormBuilder layout and appearance
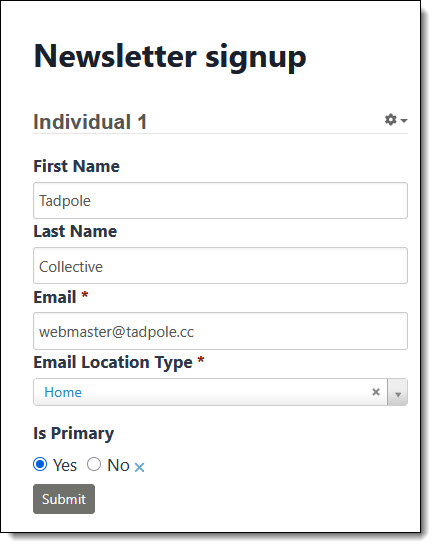
This screenshot shows our form without any adjustments made to the default settings on the FormBuilder canvas. By default, dragging fields or field blocks onto the canvas will stack them so that each field shows up on a separate line. You may want to keep the First and Last Name fields on one line and the email fields on another. To do this, you’ll want to put them in separate Containers so they can be dealt with separately.
Container is the first option listed under the Elements list for each tab you add to your Form. Once placed, clicking on the gear in the upper right-hand corner of the Container will expose options for the presentation of the content placed within it. The Layout option offers three choices: stacked, evenly-spaced columns, or inline.
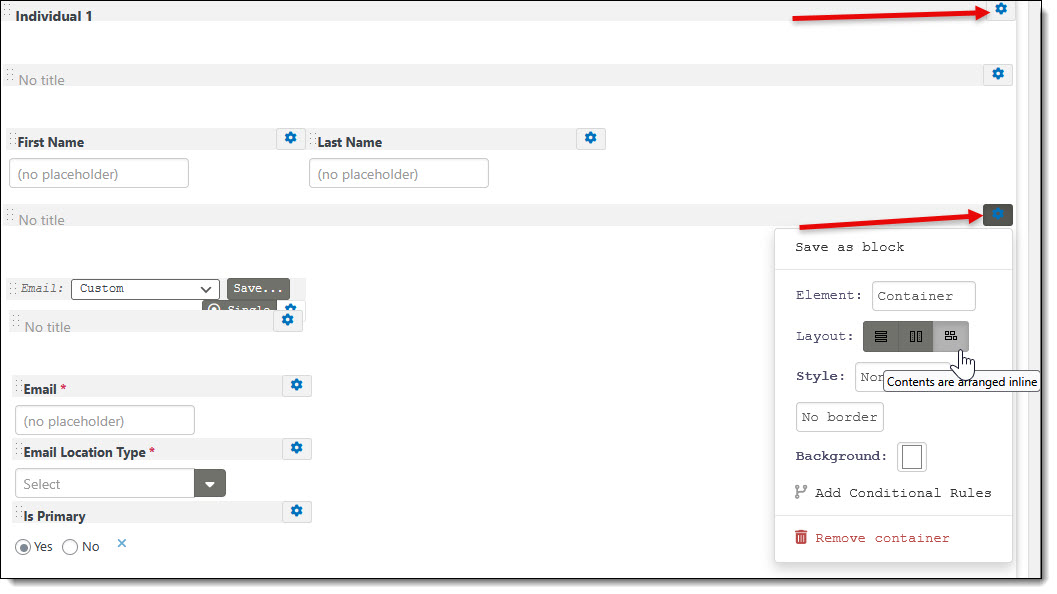
We added two Container elements to our canvas then dragged our Contact fieldset into one of them and our Email fieldset into the other. For both fields we opted for the inline display. We also removed the labels for Individual one and changed the label for Email Location. We also limited the options to Home, Work and Other as described in the section above, Configuration options for the Email block.
Additional CSS styling can be applied once the FormBuilder form is embedded on your WordPress page.