Using CiviCRM Profile Sync with Advanced Custom Fields Extended (ACFE)
Tadpole has been exploring alternatives to the Caldera Forms for CiviCRM (CFC) plugin which is no longer actively maintained or supported by its developers. We’ve been working on a solution that uses Advanced Custom Fields Pro and the Advanced Custom Fields Extended (ACFE) suite of enhancements to create forms that integrate with CiviCRM fields and profiles. This solution requires the CiviCRM Profile Sync extension.
This is an integration tool, not a form builder, though it does allow you to create front-end forms. It primarily provides a way to map data between CiviCRM and WordPress user records and Custom Post Types. On May 6, 2022, Tadpole hosted a virtual Lunch and Learn where Dana Skallman gave an update on the work, demonstrating how this method can be used to create front-end forms for your website to write data back to your CiviCRM database. Below is the full recording of the session, followed by a summary of the demonstration.
Using ACF Field Groups with CiviCRM Profile Sync
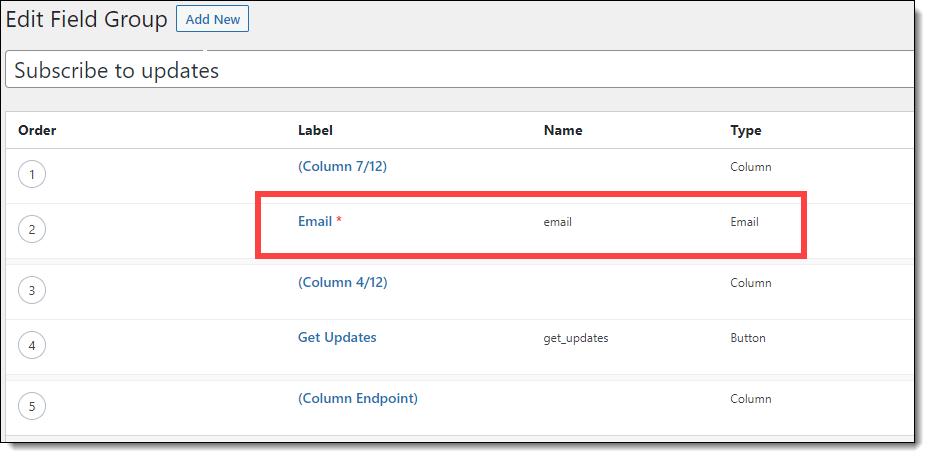
[03:00] Dana stepped through setting up an ACF Field Group to create our form fields and layouts. She included a few Column type fields to control for mobile layouts, but in this example we’re only collecting data from a single field, Email Address and using a Button to submit the form data.
The CiviCRM Profile Sync extension is the connecting glue. When installed, a couple of things happen within the ACF field editing window. First, you’ll see the CiviCRM Field, which allows you to map your ACF field to the corresponding field in the CiviCRM database. While the CiviCRM Field is labeled “Optional” it isn’t optional in all cases, so best practice dictates that you set this here.

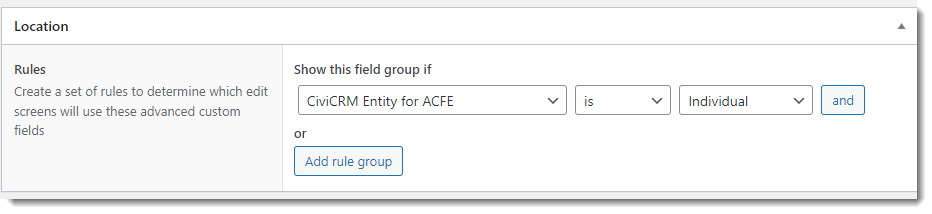
[04:00] Profile Sync also adds an option to the Location Rules dropdown, “CiviCRM Entity for ACFE.” This is used to indicate where in the database we want the Field Group data to be stored. For this example we selected “Individual,” but all CiviCRM entities, including Contact subtypes, are available in the dropdown via Profile Sync.
An additional feature is made available when the Advanced Settings are toggled on [04:45]. Dana demonstrated how to hide the form label from appearing above the Email field and instead include some placeholder text in the field itself.

Using ACFE Forms for front-end display and CiviCRM Mapping
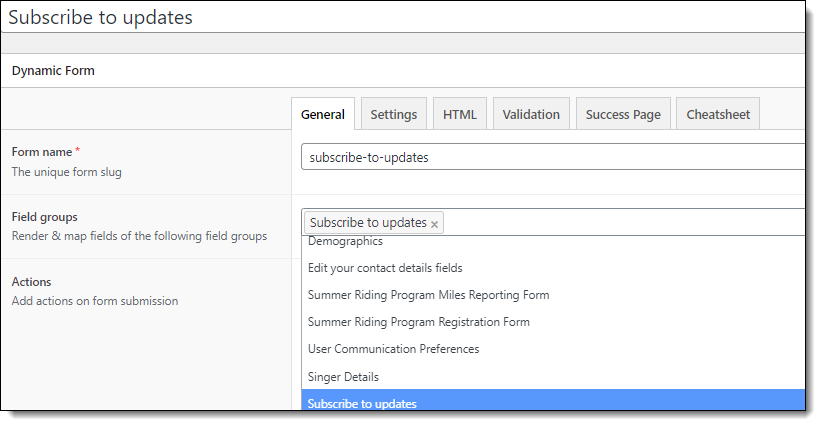
[05:55] Once our Field Group is configured and saved, we can create a Form for front-end display to collect our data. Dana walked through the basics of setting one up using ACFE Actions, equating this task (for those who are familiar) with CFC Processors. She noted that the Form needs to be saved before all of the CiviCRM mapping options will appear. She also demonstrated how to modify the Success page to display a message to the user upon submission, rather than re-displaying the form.
A unique slug is required to be entered in the Form name field. The Field Groups drop-down will display all the ACF field groups that are available to use in your form.
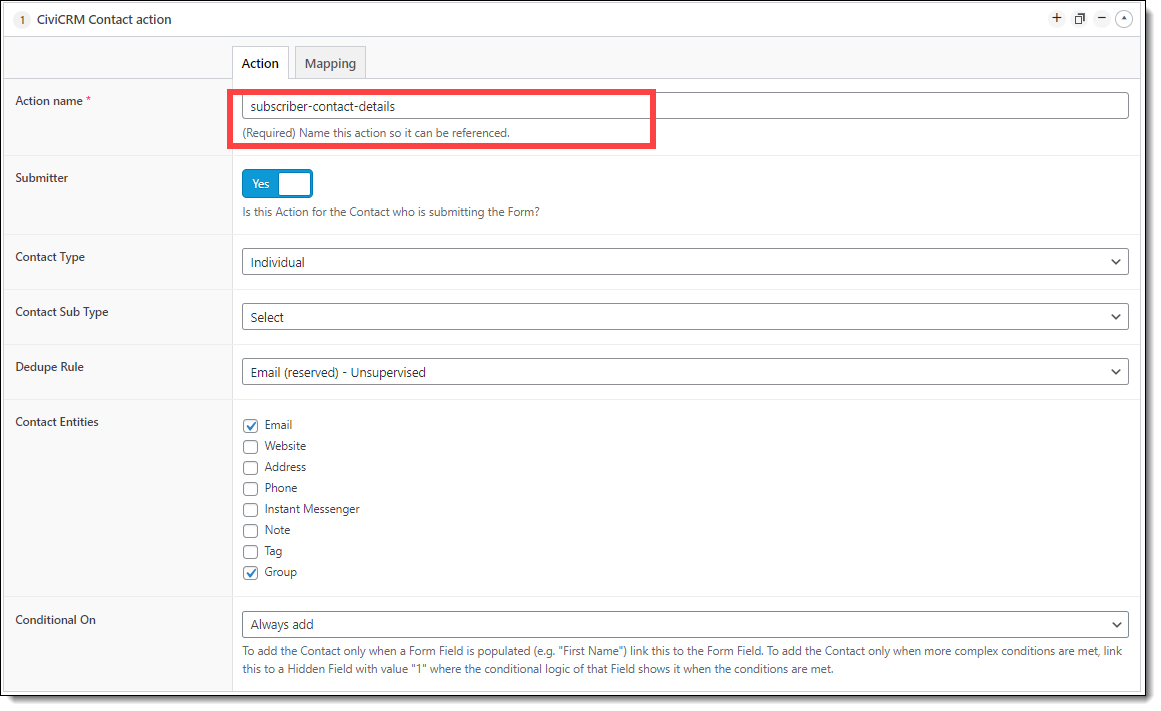
[06:45] Once we’ve selected our “Subscribe to Updates” Field Group we need to add/configure the Actions we want to be taken when the form is submitted. For our Subscribe example, we want a Contact and Activity action. Each Action comes with its own set of configuration options, for example, a Contact Action will ask us how we want to handle De-dupe Rules, an Activity action will ask if there are any related Campaigns, Cases, etc. The Contact Action needs a unique name, too, as this is what we’ll use to reference the Contact in our Activity action. The Contact Action also presents us with checkboxes so we can indicate which CiviCRM Contact fields we want to write to.
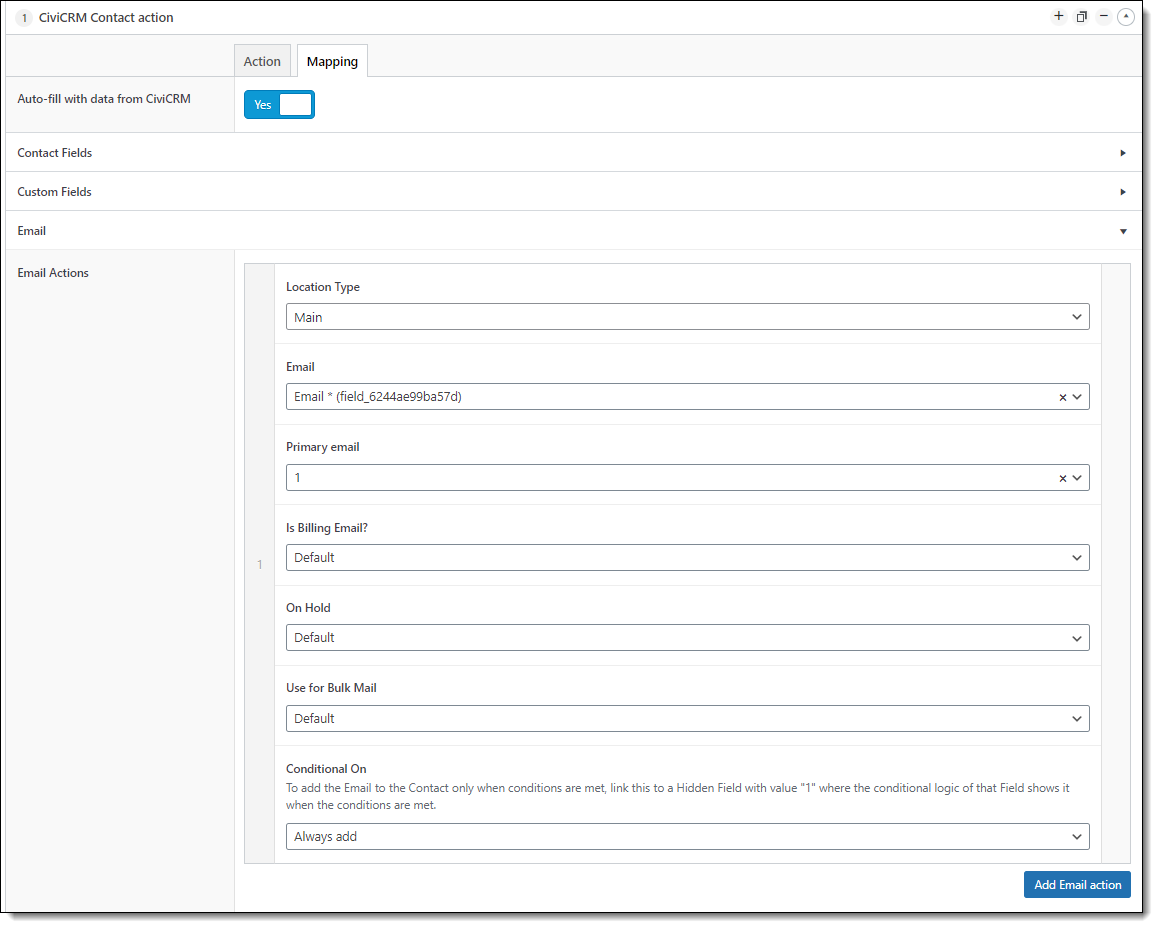
[07:25] The Mappings tab for the Action will display all the fields, including any CiviCRM Custom Fields, available for the selected Entity Types. Our example doesn’t collect anything other than an email address; Dana walked us through mapping our email data to a CiviCRM Contact record and adding that Contact to our email newsletter Group.
[09:10] The Mapping section for the Activity Action is where we put our unique Contact Action slug, here subscriber-contact-details. This will log the Activity to the correct CiviCRM Contact.

[10:30] Just below the main section of the Mappings tab is an expandable section containing. Activity Fields. For her demonstration, Dana entered a Subject and then showed us how the Activity was entered into CiviCRM with the Subject as the Activity name in the Contact record.
Some things to keep in mind:
- Custom Fields need to be defined in CiviCRM before they can be made accessible in your ACFE forms.
- The first Action set in the ACFE Forms must always be a Contact Action so that all dependent Actions (e.g., Activities) have the required Contact ID.
- Each form will have one Submitter, regardless of how many Contacts are being added.
Contact Form Example
[12:30] Dana stepped through another example with a Field Group that included First Name, Last Name, and a Message text input field in addition to Email Address. In this use case, we want to capture the submitted contact details and whatever text they entered into the Message field, and log the submission as an Activity in CiviCRM.
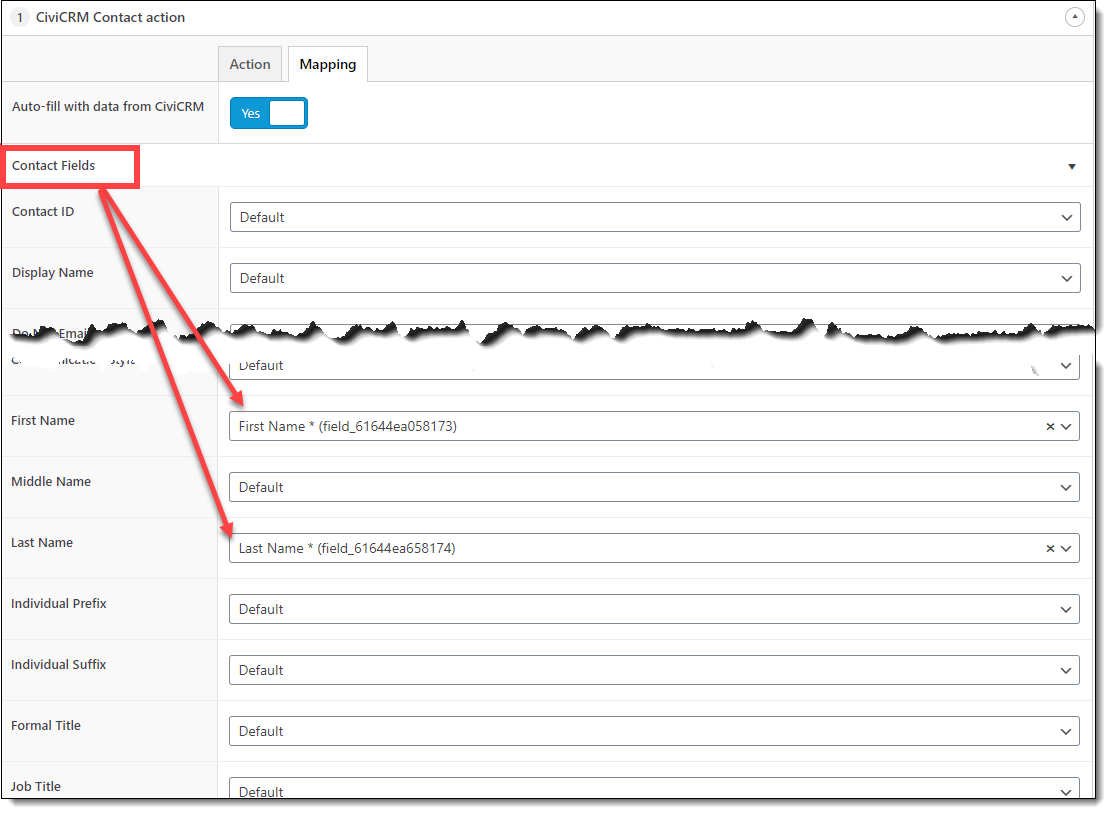
[15:10] As in the Subscribe to Updates form, in the CiviCRM Contact Action settings, we toggle the Submitter to Yes to indicate that the person submitting the form is the CiviCRM Contact, apply any de-dupe rules, and tick the checkboxes for the CiviCRM fields we want to write to. [15:50] In the Mappings section — in addition to mapping the collected email address — we also need to map First and Last Names in the Contact Fields section:
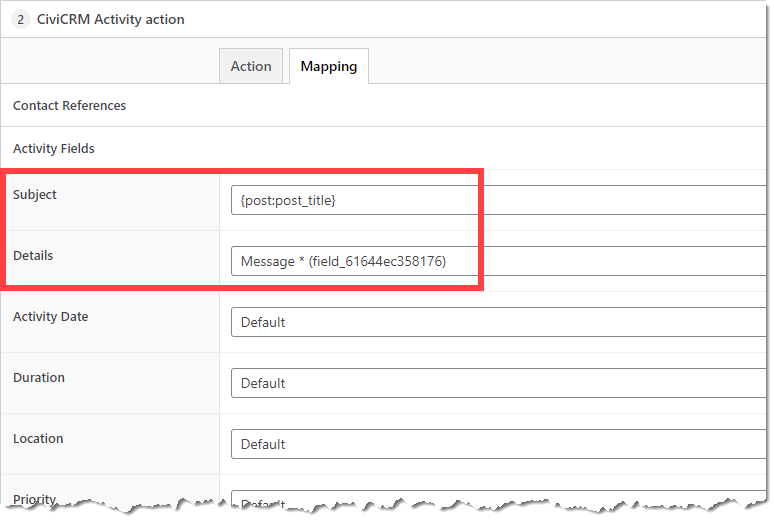
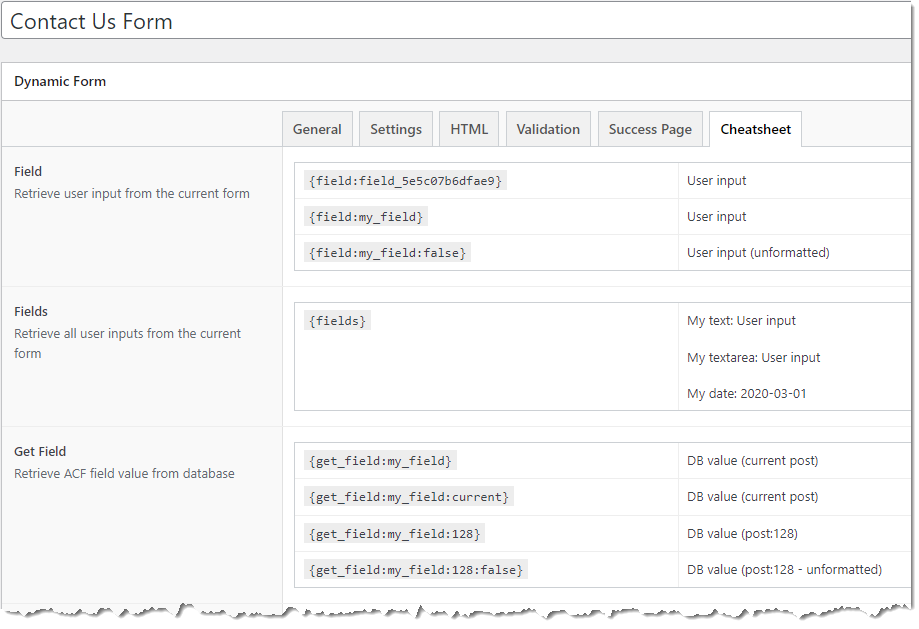
In the Activity Action section, we set our Activity Type to “Form Submission” and Activity Status to “Completed.” [16:15] Then, in the Mappings tab, we map the collected Message text to the Details field and set the Subject by using a “template tag.”

[18:01] Dana demonstrated how to add an Email Action with template tags for email notifications, and how to set up page redirects instead of using a Success message.
Writing multiple contacts to CiviCRM with a single ACFE Form
[20:11] In this example, we looked briefly at how to collect multiple sets of contact data. This form allows a user to sign up for a summer riding program and register additional riders.
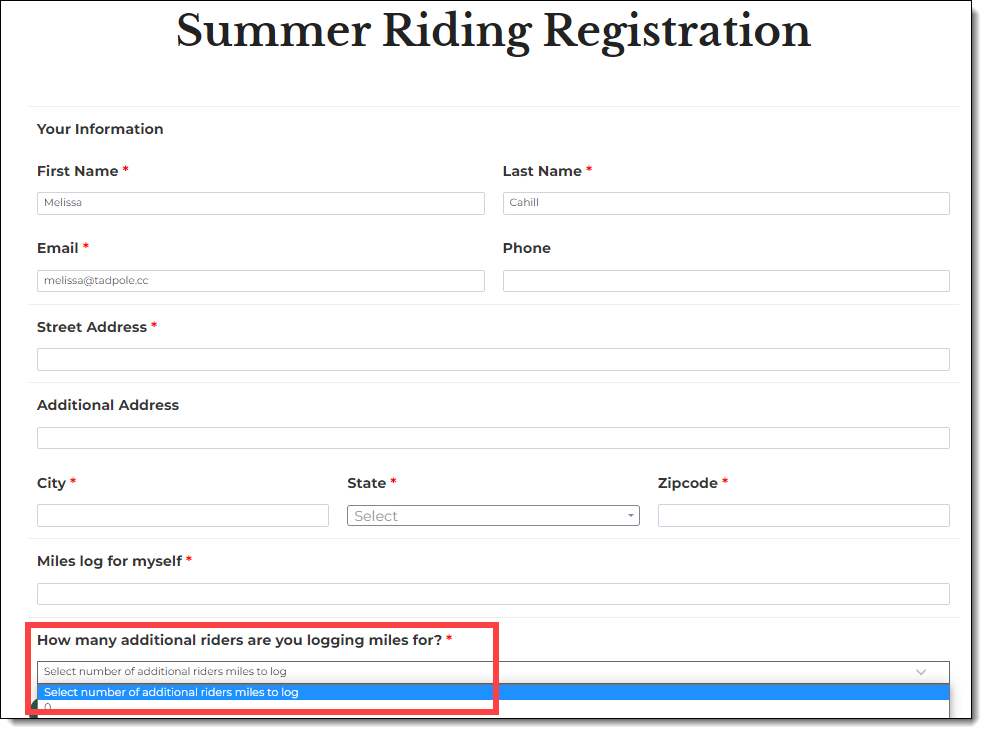
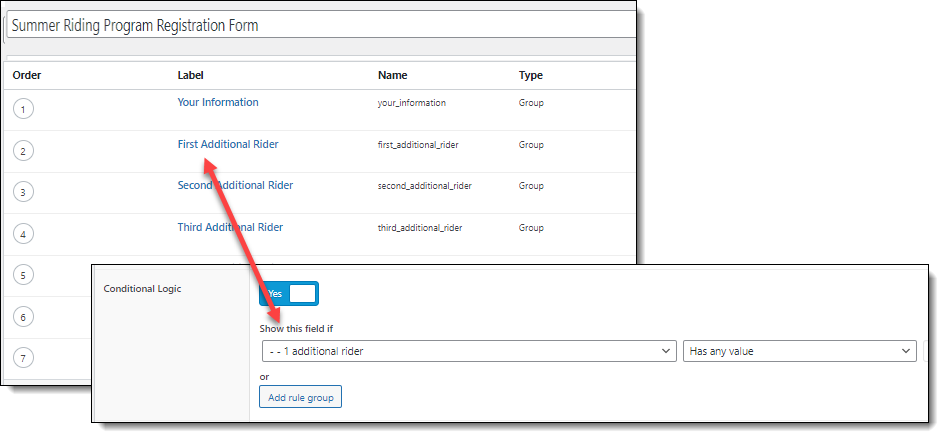
[20:50] Dana gave a brief overview of how this was set up using the ACF Group type field to create grouped sets of contact data fields for each individual being registered for the riding program. Conditional logic settings are applied to show the proper number of grouped fields based on the user’s selection from the form’s drop-down menu.
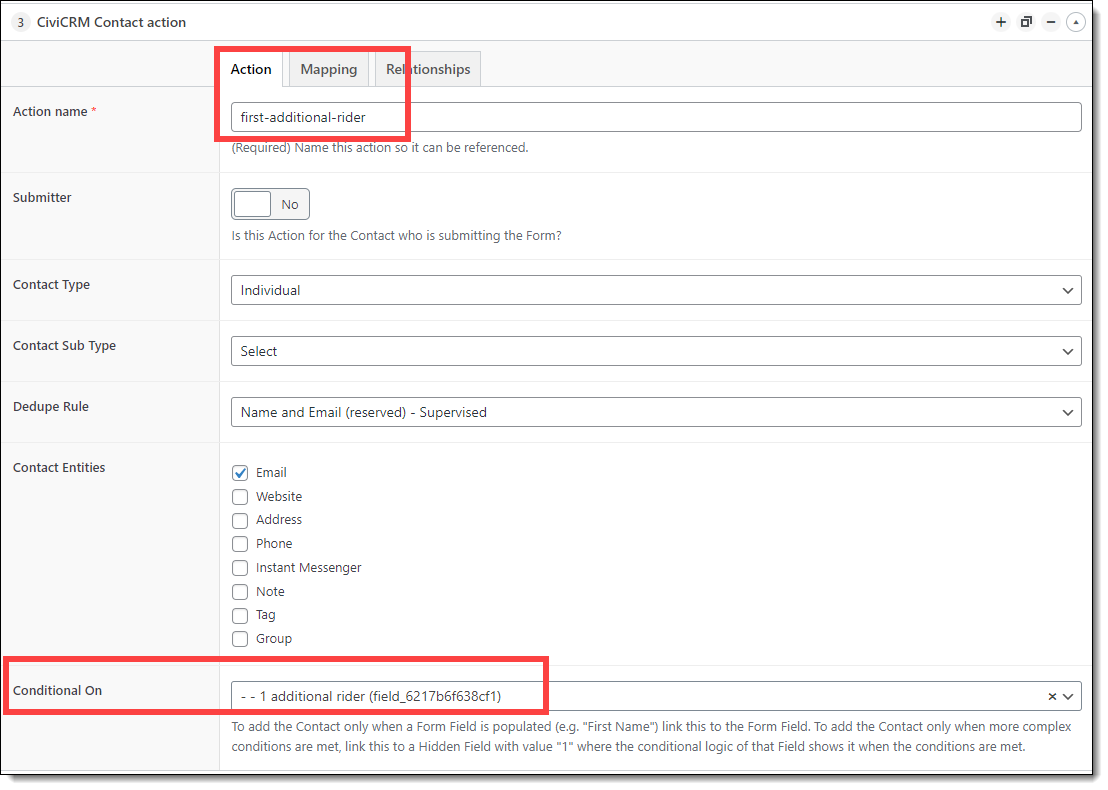
Because this example collects more data, e.g., address, phone number, etc., we need to set up more Actions in the Form along with the required field mappings. We’re asking for Name, Email, Address, and Phone Number for the form’s submitter and each additional rider, so we set those Actions, apply the conditional logic rules, and map all related fields accordingly. Dana noted that this is example is fairly complex and encouraged anyone needing help to reach out directly.
Simple CiviCRM Case Example Application Form
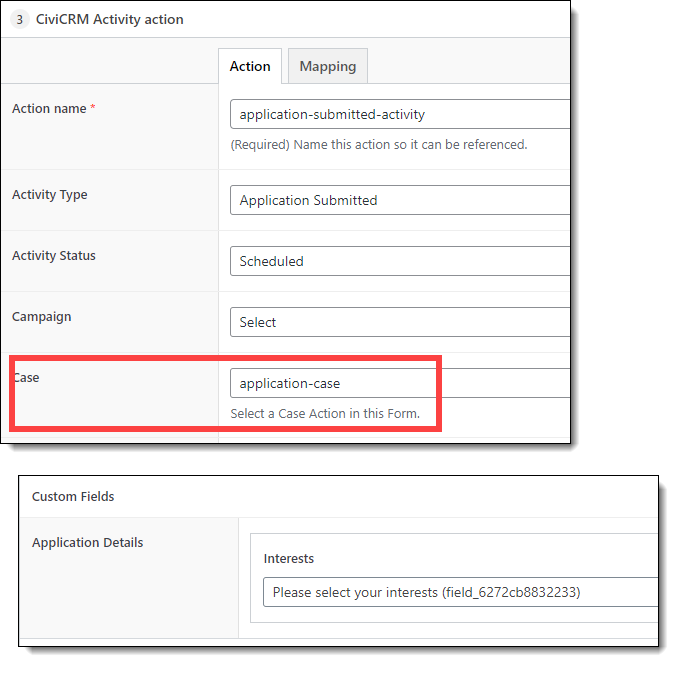
[25:00] Profile Sync includes a CiviCRM Case Action; Dana demonstrated how the submission of an application form can be used to create (or update) a CiviCase. In this example, we set our Case Type to Application and mapped the Case Client and Case Created fields to use the submitter’s contact info. We can also assign a Case Manager by starting to type their name in that field which uses a live look-up from the CiviCRM database. After mapping the Contact Reference fields, we map the Case Details to use the title of the post/page where the application form appears.

In addition to the Case Action, we can enter one or more Activities to the Case using an Activity action. In this example, Dana we mapped a Custom Field to collect the Interests the submitter selected on their application form.