Using Caldera Forms to Post User-Submitted Content
Caldera Forms is a powerful tool for adding custom forms to your WordPress website. With the use of Caldera’s Custom Fields Add-On, you can provide a way for users to add new content to your site without having access to the WordPress Dashboard. This can be useful for soliciting contributions by readers of your blog or website, allowing them to add a Page or Post that is set to DRAFT mode for further review and approval by a site administrator.
1. Locate and install the Custom Fields Add On.
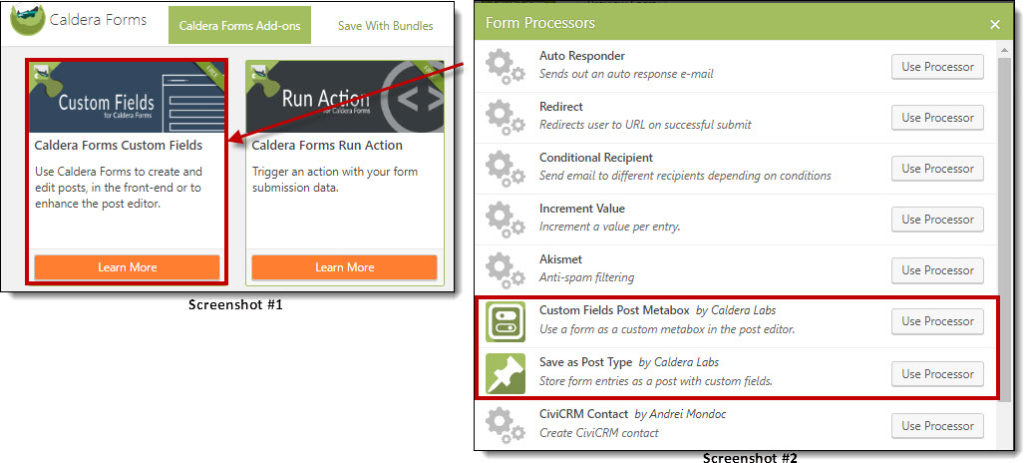
You’ll find Add Ons in the Caldera Forms section of the WordPress menu (see screenshot 1). The name of this Add On is deceptive. In fact, it’s TWO Add Ons: one processor that provides for Custom Fields, another that allows you to Save as Post Type. Once installed, you will see both Add Ons in the list of available Processors across all Caldera Forms (see screenshot 2).

2. Set up your front-facing form.

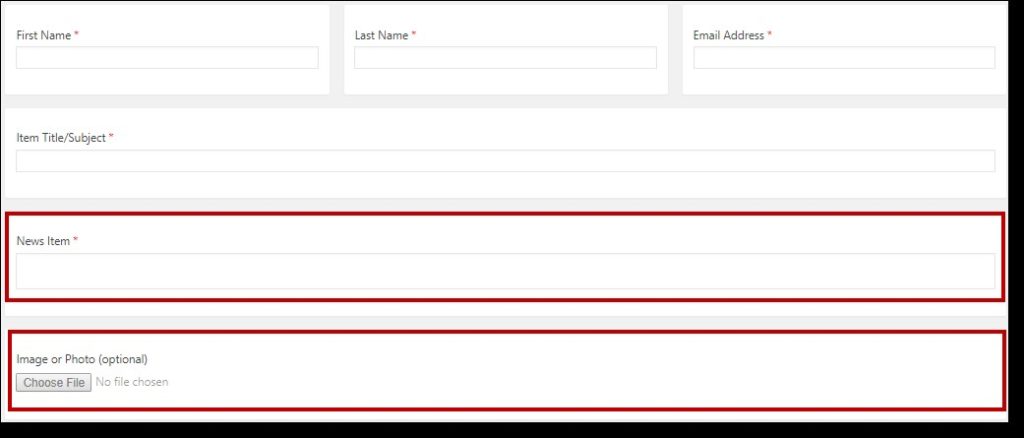
Make sure to include a Paragraph Text Area or Rich Editor field on your form. You may optionally include a File Upload field to allow users to submit images to accompany their content (see screenshot 3).
3. Map the Save as Post Type Processor to your form fields.
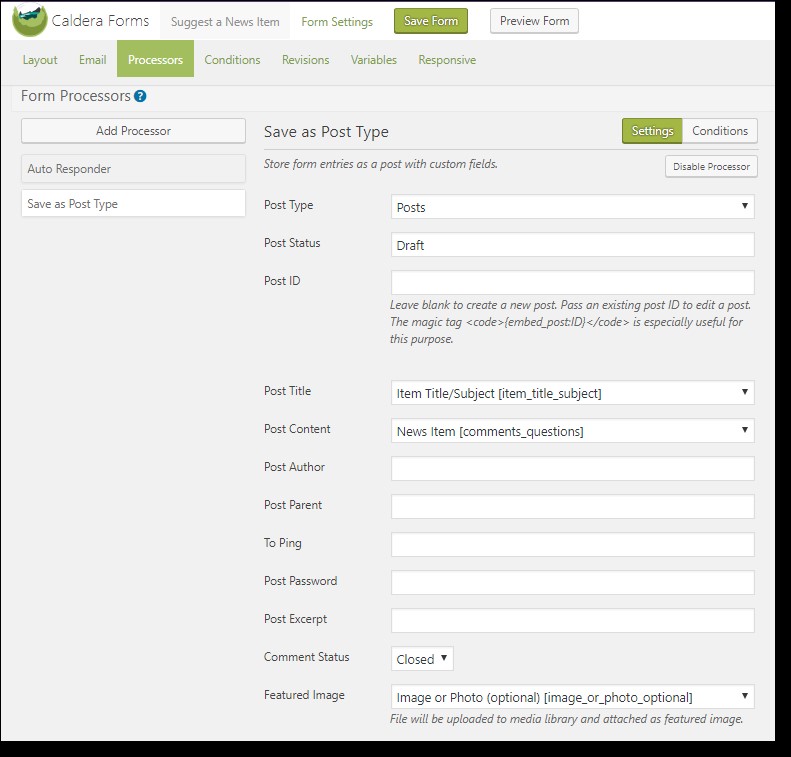
After saving your form layout, click on Processors then select the Save as Post Type Processor. The Settings allow you to designate what type of content should be added to WordPress: Posts, Pages, Media, Custom Post Types, etc. If you want the submitted content set to DRAFT upon upload, enter Draft in the Post Status Field. You can map the title, content, author to the field data collected in your form and can any Categories and other taxonomy types as needed.

