Using the CiviCRM Group Sync Extension for Membership and Access Control
Both WordPress and CiviCRM allow for the grouping of users either to provide special access to content on the front-end, e.g., a special membership area; or to grant administrative privileges on the back-end. CiviCRM also uses Groups for email subscription lists.
By default, WordPress comes with five basic user groups: Subscriber, Contributor, Author, Editor, and Administrator; these are all meant for providing access control to the WordPress Dashboard. However, if you want to restrict content areas on the front-end of your website to users who are entered into your CiviCRM Membership database — or grant varying levels of access to your CiviCRM backend to a select group of WordPress Users — the easiest solution is to create Groups on WordPress that mirror your CiviCRM Groups.
You’ll need the WordPress Groups plugin by itthinkx to create the additional user groups in WordPress and the CiviCRM Groups Sync extension to enable the sync with your CiviCRM contacts. For the “members-only” use case below, you’ll also need the CiviCRM WordPress Member Sync plugin.
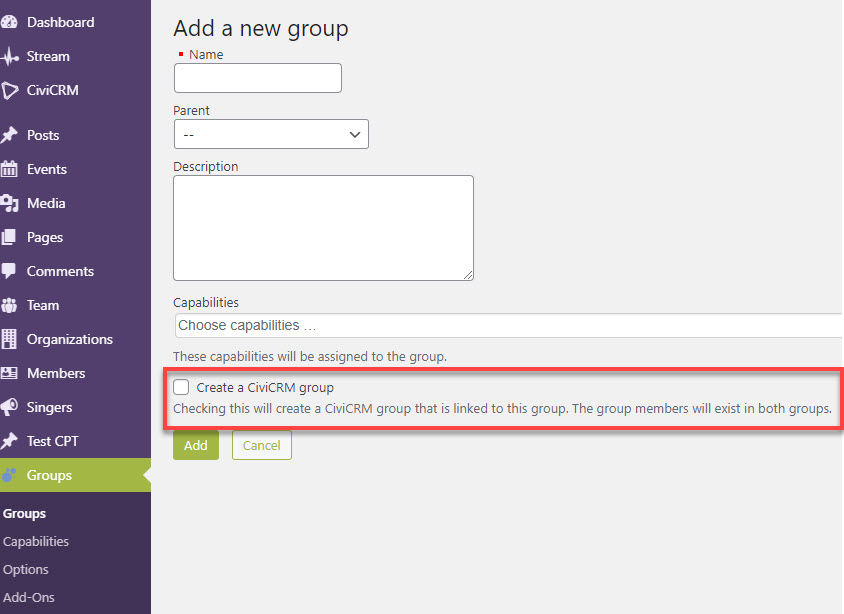
Once the Groups plugin is activated, you’ll see a new item added to your WordPress menu. When adding a new Group, be sure to check the “Create a CiviCRM group” checkbox. This creates the connection between your WordPress Users and CiviCRM contacts.
Restricting “members-only” content
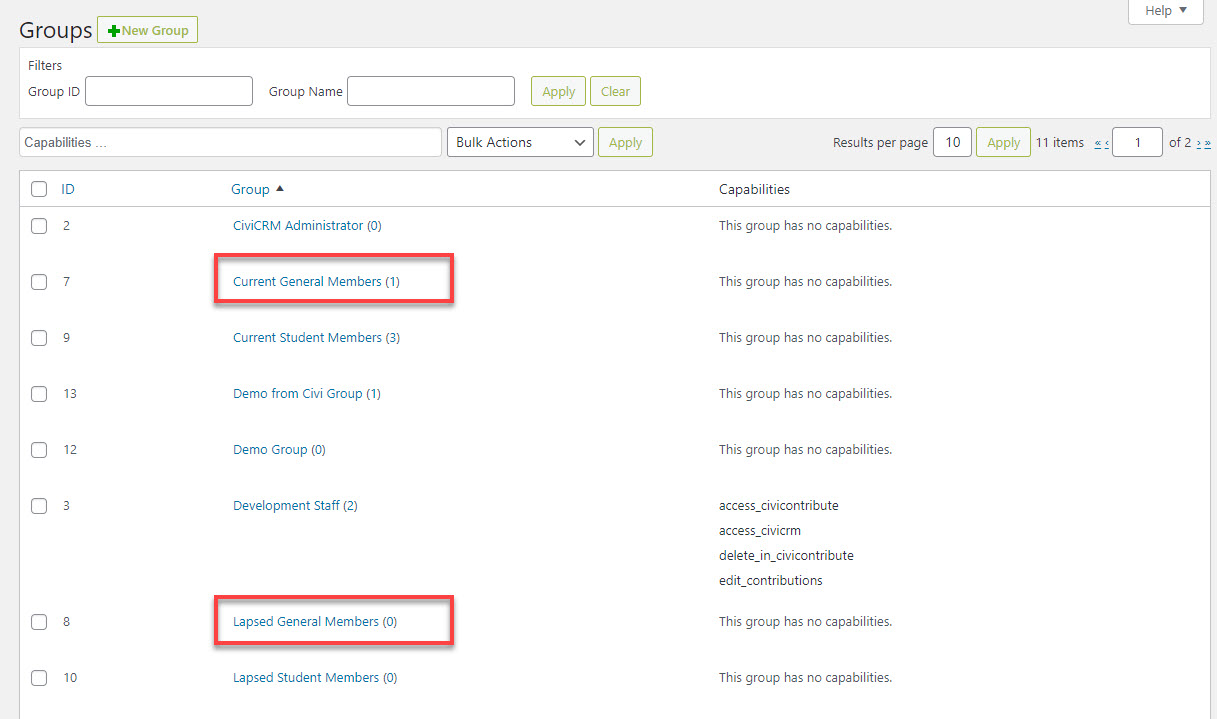
CiviCRM Membership tracks your members’ status (i.e., current vs. lapsed membership) and the CiviCRM WordPress Member Sync plugin can be used to maintain identical data in WordPress. First, create two separate WordPress Groups: Current Members and Lapsed Members.
Then, use the Member Sync plugin (appears under the CiviCRM menu item), Association Rules tab, to assign your new WordPress Groups to your CiviCRM Membership groups. Create a new Association Rule, then apply the appropriate CiviCRM statuses to both the Current and Lapsed WordPress Groups.

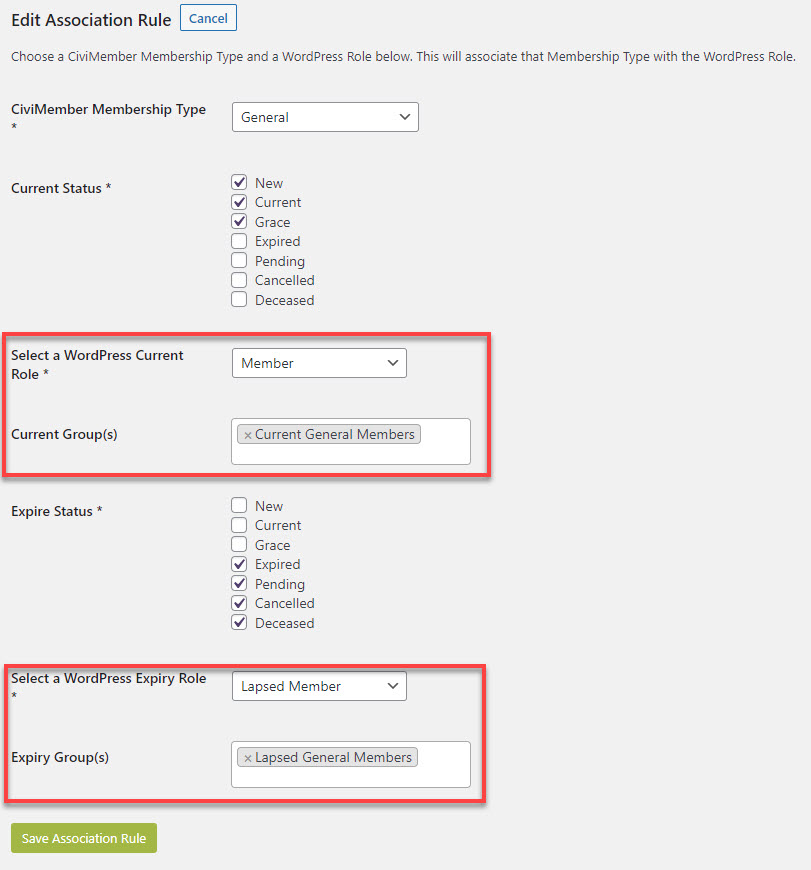
Note that any rules applied here will override roles applied in WordPress.
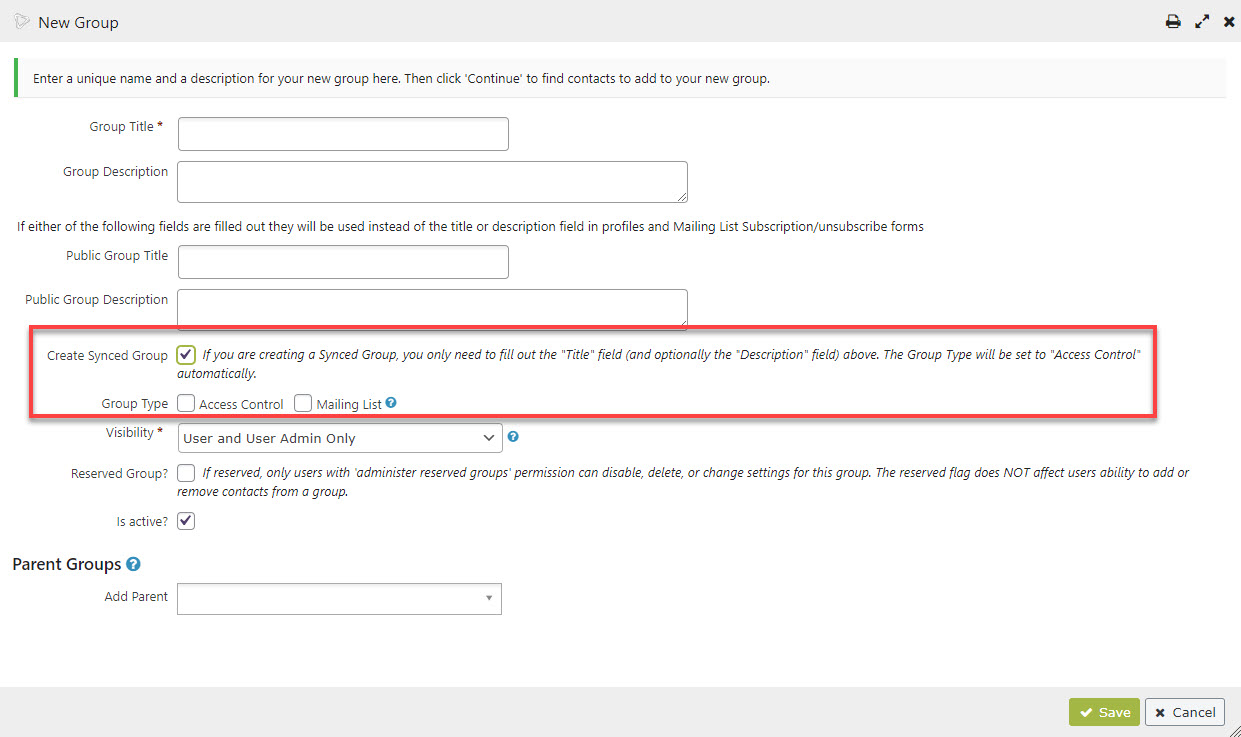
Also note that you can also create your Groups in CiviCRM. Checking the “Create Synced Group” checkbox duplicates the behavior we walked through using the Groups plugin in WordPress.
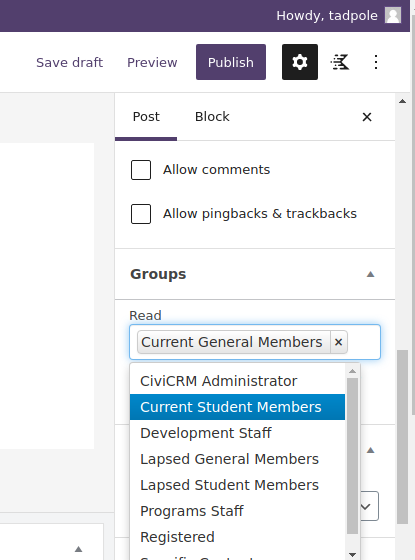
Once membership Groups have been defined (and any necessary Contacts added to the CiviCRM Group), we can grant page-level access in WordPress. The Groups option appears on the Page/Post Settings of your block editor.
If you use the Groups plugin to grant page-level access you don’t need to do anything special to hide the restricted page/post in any WordPress Menus. It will only show to those Groups to whom access was assigned here.
Groups Blocks for displaying different content to different group members on the same page
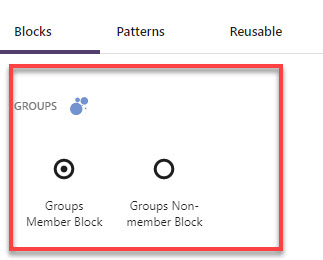
The Groups plugin also gives you a way to display different content blocks on the same page to users in different Groups using two special blocks:
- Groups Member Block – to show content to members of a Group
- Groups Non-member Block – to show content to members who are not in a Group
Add your desired Groups block(s). Each of these block acts as a container into which you’ll add content, e.g., text, images, etc. Once these blocks are added you can select the groups that can see the content blocks within the container — settings appear with all the other Block settings and work the same way as they do for page level access. Any content blocks added within these Groups blocks will automatically have those Group settings applied.
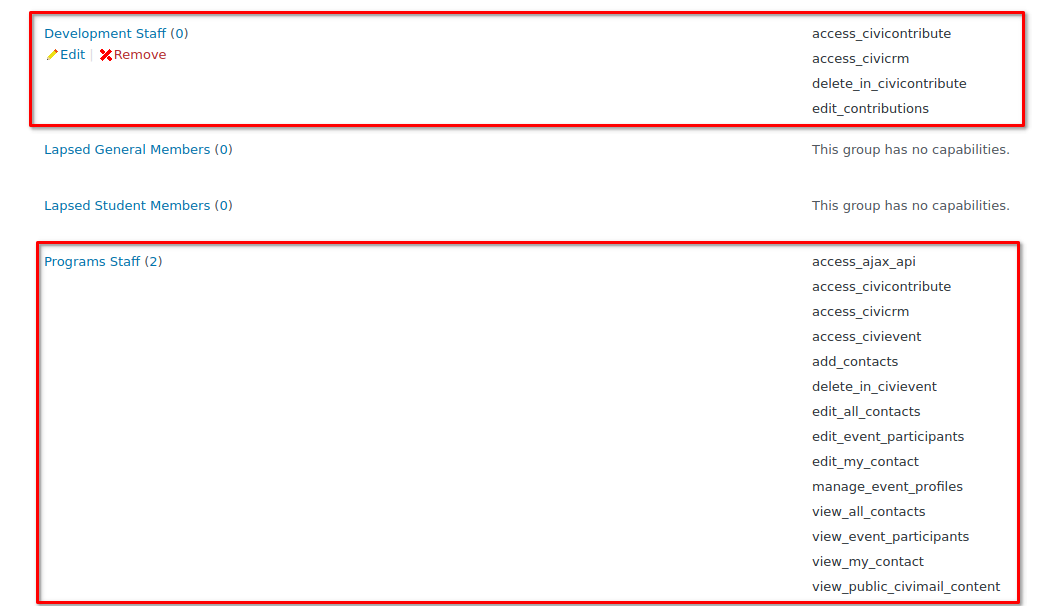
Staff access to CiviCRM based on Civi Component
The Groups plugin can also be used to grant access to various portions of the CiviCRM backend. Create staff Groups, populate them with the appropriate contacts, and assign access giving each program or department access based on what they need to see for their work.
- Create a new Group
- Give WordPress users specific access using WordPress ACLs
- Use the Contact Summary Editor to designate what each Group sees on their CiviCRM Dashboard.
